Thursday, September 2, 2010

Homemade Pasta!


Well folks, Pat and I have the homemade pasta bug, which we acquired at a cooking class we took together on my birthday.  Basically making pasta is soooo easy, and it's fun (it's actually quite novel), so why not make some for yourself?  We (read: Pat) has been really, really, really wanting to make pasta at home since the class, and we finally did it (hey, it only took me about 2 weeks after the class to get the motivation to make the pasta)!

You don't necessarily need a pasta roller, to make pasta.  In fact, our teacher told us that the person who taught him to make pasta was an old Italian immigrant that lived in the Bronx; she used to make pasta everyday, roll it out by hand with a rolling pin, and hang it around her house to dry.  I have this very romantic image of this little old Italian woman in the bronx making pasta by hand...it really makes you appreciate the art of making food, like truly creating food for love, not just to stuff ourselves silly.  

Anyway, if you have a pasta roller, it does make the processes a lot easier.  The recipe for making pasta is ridiculously easy.  The one we used is from The Chopping Block...enjoy!

Your ingredients

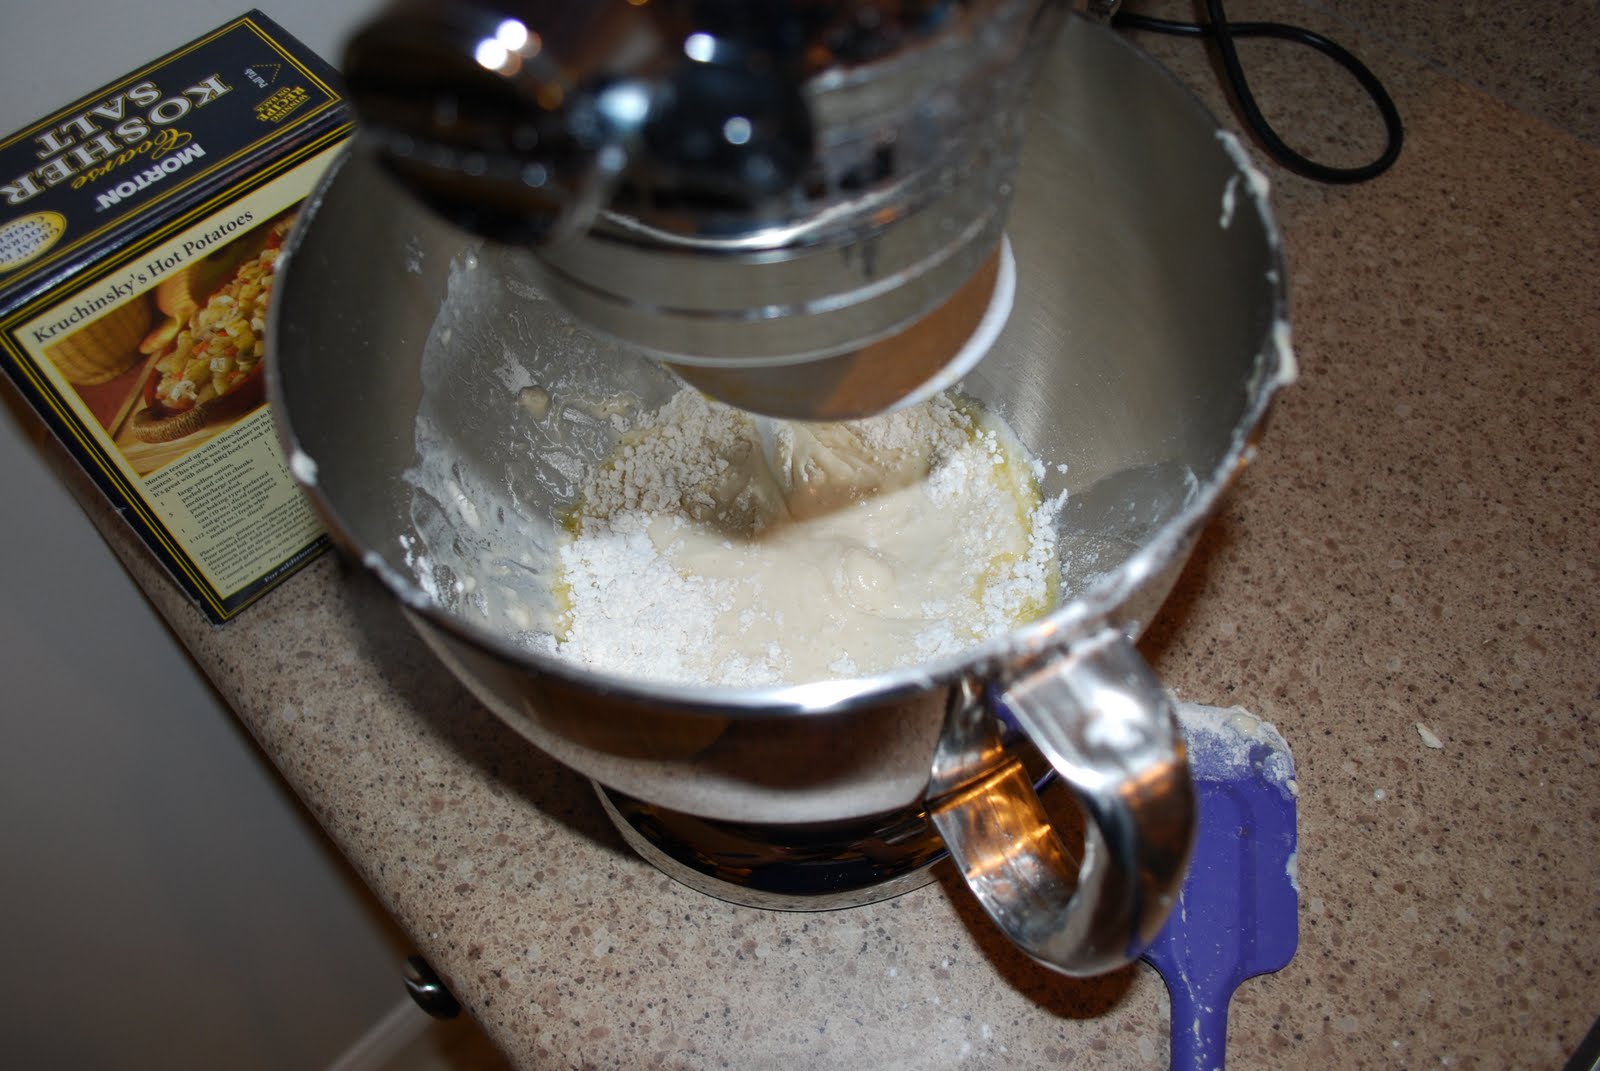
Blend all ingredients 
Dough Ball
Roll out the dough.
Cut your pasta and enjoy.

Ingredients
2 cups unbleached all-purpose flour
1/4 cup semolina
3 eggs
1-2 tablespoons water

Directions
1.  Place the dry ingredients in the bowl of a food processor.
2.  Add eggs and 1 tablespoon of water; process until well combined.
3.  Test dough to make sure it will hold together.  If it is dry, add up to a tablespoon more water as needed to make the dough moist, but not sticky (I used 2 tablespoons of water).
5.  Wrap the dough tightly in plastic and allow it to rest at least 20 minutes.
6.  Roll out pasta in a pasta roller until smooth, then roll into sheets and cut into desired noodles.**
7.  Plunge pasta into rapidly boiling salted water, cook until tender, about 2 minutes, and serve at once with your favorite sauce.
8.  If you do not want to use right away, the pasta can be frozen, or laid straight to dry.

**To use a pasta roller: start by cutting dough ball in half.  Flatten one edge of dough ball to run through pasta roller smoothly.  After the dough has gone through one time, fold it into thirds to make a straight edge to run through the roller with the open edge feeding through the roller first (see photo below-excuse the blurriness).  Run thru the roller until you can seal the edges into a large loop.  Run the loop of dough through each size on the roller at least twice until the desired thickness.  Make sure to use enough flour to prevent sticking.  At this point the noodles can be cut by the machine or by hand. 


Homemade Spaghetti! 


Wednesday, August 18, 2010

S'more's Cookie Bars


Hey everyone!  I am so happy to share this phenomenal recipe with all of my followers (or anyone that happens upon my blog), as I LOVE S'MORES!!!  They remind me of childhood, camping, fun, laughter, and relaxing by the fire...there is something so nostalgic about roasting a marshmallow over the fire on a stick.  So, the other day I was perusing one of my favorite food blogs, Crepes of Wrath, and I saw this recipe...I just knew I HAD to make it.  Let me tell you all, run, do not walk to make this recipe, you'll be glad you did.  Enjoy!

S'more Cookie Bars

Ingredients


1/2 cup unsalted butter, room temperature
1/4 cup brown sugar
1/2 cup granulated sugar
1 large egg, room temperature
1 tsp. vanilla extract
1 1/3 cups all-purpose flour
3/4 cups graham cracker crumbs
1 tsp baking powder
1/4 tsp salt
2 extra large chocolate bars that are large enough to fill an 8" x 8" pan--I used Hershey's chocolate
1 1/2 cups marshmallow fluff--about one jar

Directions
1.  Preheat oven to 350 F.  Grease and/or line an 8" x 8" brownie (square) pan.
2.  In a large bowl, cream the butter and sugar together until light.  Beat in the egg and vanilla.

Sugars and butter
After eggs and vanilla 
3.  In a small bowl, whisk the flour, graham cracker crumbs, baking powder, and salt.
4.  Add the dry mixture to the butter mixture and mix at a low speed until combined.  

Finished graham cracker dough
5.  Divide the dough in half and press half of the dough into an even layer on the bottom of the pan.  If it seems thin, that's okay, the dough will rise during baking.


6.  Place chocolate bars over dough in an even layer.


7.  Spread the marshmallow fluff over the chocolate bars.
8.  Top the fluff with the remaining dough by forming the dough into sheets with the palm of your hands and laying it down.


9.  Bake for 30-35 minutes until lightly browned.  You can cover the top of the pan with foil if it is browning too quickly.


10.  Now, here's the hard part...Let it cool completely before cutting, because they will crumble when you try to cut them if you don't.

ENJOY!!!

Sunday, August 15, 2010

Chocolate Chip Cookie Dough Cheesecake


Well, once again, I have been seriously lacking in blogging...I blame it on my new internship and adjusting to life after school (in addition to juggling multiple other responsibilities)! Well, I made this cheesecake back in May as one aspect of Pat's birthday dinner, so I've had the pictures for quite some time! Ha. I have to admit that this is one of the best cheesecakes I've ever had (and made).

The first part of making this cheesecake was to make the chocolate chip cookie dough (recipe from Marcy Goldman's A Passion for Baking). Now, if you're considering making this and don't want to make the chocolate chip cookie dough yourself, by all means, buy store bought cookie dough. I made the cookie dough using the recipe she recommend, however, feel free to use your favorite CC cookie dough recipe.

Tender, Buttery Chocolate Chunk Cookies
Ingredients
1 cup room temperature unsalted butter
1 cup firmly packed light brown sugar
1/2 cup white sugar
1 1/2 teaspoons pure vanilla extract
2 large eggs
2 cups all-purpose flour
3/4 teaspoon baking soda
1/4 teaspoon salt
3 cups chocolate chips or coarsely chopped semisweet chocolate

Directions
1. Preheat oven to 350 F.
2. Cream butter and sugars until very smooth (3-4 mins).
3. Add vanilla and eggs and blend well.
4. Fold in flour, baking soda, and salt and mix well (2-3 mins).
5. Add chocolate chips.
6. Put onto baking sheets and bake for 10-13 mins. for smaller cookies or 14-18 mins. for larger cookies.

Now, I clearly didn't cook these cookies, because I needed the dough for the cheesecake, but if you wanted to do that, you could :) Instead, I cut them into 1 inch chunks and set them aside for use in the cheesecake.

Onto the cheesecake! Here are the ingredients:

Chocolate Chip Cookie Dough Cheesecake
Crust
1 1/2 cups shortbread cookie crumbs (I used Lorna Doone cookies).
1/4 cup unsalted butter, melted
1 tablespoon sugar
Pinch of cinnamon

Cheesecake
1 batch of chocolate chip cookies
2 pounds of cream cheese at room temperature
1 (14 ounce) can of sweetened condensed milk
1/4 cup sugar
Pinch of salt
3 large eggs
2 teaspoons vanilla extract
2 tablespoons of all-purpose flour
1/3 cup whipping cream
1/3 cup mini semisweet chocolate chips

Directions
1. Preheat oven to 350 F.
2. Toss crust ingredients into an ungreased 9 or 10-inch springform pan and press into pan bottom.


3. Blend cream cheese with condensed milk, sugar, salt, eggs, vanilla, flour, and whipping cream. Blend until smooth, about 4-6 mins.
4. Pour half of the batter into the pan; scatter most of the chocolate chips and half of the cookie dough chunks into the batter.

5. Top with the remaining batter, cookie dough chunks, and remaining chocolate chips.
6. Bake in a water bath for approximately 45 mins. to 1 hour, remove from bath, and place on a cooling rack. Make sure your pan is wrapped in a double layer of tin foil before you place in the water bath.
**Note: this is a deviation from the original recipe. I prefer to bake my cheesecake in a water bath, while the author of this recipe prefers to bake for half of the time with the oven on, then reducing the temperature and finishing in a reduced temperature oven. Finally, she turns off the oven and opens the door, letting the cake cool in the oven for an hour.
7. Refrigerate overnight then enjoy!


Friday, May 7, 2010

Olive Oil Chocolate Chip Cookies!


Lord! I just realized that I haven't posted in over a month!!! Yikes. Anyway, graduating from veterinary school, looking for a place to live, and moving leaves you very, very busy. Soooo, to break from my baking/cooking hiatus, I wanted to try another, different style of chocolate chip cookie, the olive oil chocolate chip cookie. I got the recipe from this wonderful blog I happened across called Crepes of Wrath.

Well, let me tell you, they were delicious!!! Seriously, they are crispy around the edges and soft and chewy in the middle...like the perfect cookie. I was worried that they might taste like olive oil, but they don't...they are just super tasty.

There are a few notes about the cookies. The dough does NOT taste good, like traditional chocolate chip cookie does. The dough is very wet feeling and sticky; however, do not add flour to make it less wet/sticky, because that would ruin the cookie...they bake up perfectly. So, here's the recipe. Let me know what you guys think! Cheers!

Olive Oil Chocolate Chip Cookies
2 1/4 cup all-purpose flour
1 1/2 teaspoons salt
1 teaspoon baking soda
1/4 cup extra virgin olive oil
1 teaspoon vanilla extract
3/4 cup granulated sugar
3/4 cup brown sugar
2 eggs-room temperature
1 or 2 tablespoons of milk (I used about 1 tablespoon plus 1 teaspoon)
1 cup chocolate chips (I would just use the whole bag of chocolate chips...1 cup was definitely not enough, and I don't normally love a ton of chips in my cc cookies).
1. Preheat the oven to 375 degrees F. Combine the flour, baking soda, and salt in a medium bowl and set aside.
2. Combine sugars, vanilla, and olive oil. Beat in the eggs one a time. Gradually beat in the flour mixture, then add in a tablespoon of milk to make the dough a bit firmer, maybe another tablespoon if you need it/if you feel the dough is too sticky/dry (I used about 1 tablespoon + 1 teaspoon).
3. Roll the dough into balls with your hands and place on a greased and/or lined baking sheet and bake for 10-12 minutes, until lightly golden and set. Mine took about 10 and a half minutes. These overbake quickly, so it’s better to take them out a bit early if you’re unsure. Allow to cool for a bit on the baking sheet, then move to another surface to finish cooling. For me, if I didn't cool them almost completely on the cookie sheet, the centers of the cookie would stick to the pan, so I just let them cool a while and then took them off.
This is what the sugars, vanilla, and olive oil looked like once they were combined--much like wet sand.
This is after the addition of both eggs...really watery!

This is the dough once everything was added...see how wet it looks? It doesn't feel this wet...in fact, it's actually quite stiff.

Finished cookie! They puffed up quite a bit while baking (they looked like they might be cakey), but they flattened up once they cooled. Enjoy!

Saturday, April 10, 2010

Pizza!


So, I've never made pizza crust, or any delicious bread product for that matter and I figured, what the heck, I'll give it a try. I went to foodnetwork.com and found a recipe that got good reviews and seemed easy enough. I wound up going with a recipe from Tyler Florence. So internet, here's the recipe with my two cents added! Enjoy.

Pizza Dough

Ingredients
  • 1 package active dry yeast
  • 1 teaspoon sugar
  • 1 cup warm water
  • 1 tablespoon kosher salt
  • Extra-virgin olive oil
  • 3 cups 00 flour, plus more for dusting
Directions
  1. In the bowl of a standing electric mixer fitted with a dough hook, combine the yeast, sugar, and warm water; stir gently to dissolve. Let the mixture stand until the yeast comes alive and starts to foam, about 5 to 10 minutes. This took about 5 minutes to be complete (see the second picture below).
  2. Turn the mixer on low and add the salt and 2 tablespoons of olive oil. Add the flour, a little at a time, mixing at the lowest speed until all the flour has been incorporated. When the dough starts to come together, increase the speed to medium; stop the machine periodically to scrape the dough off the hook. Get a feel for the dough by squeezing a small amount together: if it's crumbly, add more water; if it's sticky, add more flour - 1 tablespoon at a time. Mix until the dough gathers into a ball, this should take about 5 minutes.
  3. Turn the dough out onto a lightly floured surface and fold it over itself a few times; kneading until it's smooth and elastic. Form the dough into a round and place in a lightly oiled bowl, turn it over to coat. Cover with plastic wrap or a damp towel and let it rise in a warm spot (i.e. over a gas pilot light) until doubled in size, about 1 hour. This is a good time to stick a pizza stone in the oven and preheat them to 500 degrees F.
  4. Once the dough is domed and spongy, turn it out onto a lightly floured counter. Roll and stretch the dough into a cylinder and divide into 3 equal pieces (I cut mine into 2 pieces). Cover and let rest for 10 minutes so it will be easier to roll out.
  5. Roll or pat out a piece of dough into a 12 inch circle, about 1/8-inch thick. Dust a pizza paddle with flour and slide it under the pizza dough. Brush the crust with a thin layer of olive oil, and top with your favorite flavors. Slide the pizza onto the hot stone in the oven and bake for 12 to 15 minutes, until the crust is golden and crisp. Repeat with the remaining dough.
  6. Add whatever ingredients you like and enjoy!

Sunday, March 28, 2010

Blueberry Scones with Lemon Glaze

Hello internet...today's recipe is a delicious recipe taken from Tyler Florence. The inspiration to make them came from a Saturday evening dinner with good friends of ours, Elena and Danilo. We hadn't seen them in a while, and since we're all quite broke, we decided to stay in and make dinner. They planned to have breakfast for dinner, which was fine by us! They made eggs, bacon, & hash browns. Our (myself and the boy) contribution were the scones...a nice finish to a more savoy dinner.

Scone Ingredients:
  • 2 cups all-purpose flour
  • 1 tablespoon baking powder
  • 1/2 teaspoon salt
  • 2 tablespoons sugar
  • 5 tablespoons unsalted butter, cold, cut in chunks
  • 1 cup heavy cream, plus more for brushing the scones
  • 1 cup fresh blueberries
Lemon Glaze Ingredients:
  • 1/2 cup freshly squeezed lemon juice
  • 2 cups confectioners' sugar, sifted
  • 1 lemon, zest finely grated
  • 1 tablespoon unsalted butter
Directions for Scones:
  • Preheat the oven to 400 degrees F.
  • Sift together the flour, baking powder, salt, and sugar.

  • Cube the butter into small pieces and make sure they are very cold. I put them in the freezer for a few minutes after I cut the pieces.


  • Cut the cold butter into the flour mixture using a pastry blender; coat the pieces of butter with the flour. The mixture should look like coarse crumbs.

  • Make a well in the center and pour in the heavy cream.
  • Gently fold everything together just to incorporate; do not overwork the dough.
  • Carefully fold the blueberries into the batter taking care not to mash or bruise the blueberries because their strong color will bleed into the dough.

  • Press the dough out on a lightly floured surface into a rectangle about 12" x 3" x 1 1/4".
  • Cut the rectangle in 1/2 then cut the pieces in 1/2 again, giving you 4 (3-inch) squares.
  • Cut the squares in 1/2 on a diagonal to give you the classic triangle shape.

  • Place the scones on an ungreased cookie sheet and brush the tops with a little heavy cream.
  • Bake for 15 to 20 minutes until beautiful and brown. Let the scones cool a bit before you apply the glaze.

Directions for Glaze
  • Mix the lemon juice and confectioners' sugar together in a microwave-safe bowl until the sugar dissolves.
  • Add the lemon zest and butter.
  • Microwave on high 30 seconds.
  • Whisk the glaze to smooth out any lumps, then drizzle the glaze over the top of the scones.
  • Let it set a minute before serving.
  • Note on the glaze: this recipe makes a lot of glaze, so you can safely half this recipe and still have plenty leftover!
I hope you enjoy this post! Cheers!

Chicken with mushrooms, peas, and pan cream sauce

Hello to my few followers and welcome to any new readers (I hope)! Tonight I am posting a dinner which I made last week based on a recipe from the Food Network Magazine (which I actually got offline from their website). They call it chicken with creamy mushrooms and snap peas, but I changed a few things here and there, thus the name change as well. The unchanged recipe can be found here, http://www.foodnetwork.com/recipes/chicken-with-creamy-mushrooms-and-snap-peas-recipe/index.html, but I'll walk you through how I made the dish.

Ingredients
  • 1-1.5 pounds of chicken breasts or cutlets
  • 1/2 onion minced
  • Garlic, to your liking, finely minced
  • 8-10 ounces (again to your liking) of baby bella mushrooms, quartered
  • 1 cup of frozen peas
  • 1 1/4 c. chicken broth (alternatively, you can use equal parts of white wine and chicken broth)
  • 3/4 c. heavy whipping cream
Directions
  • Salt and pepper both sides of chicken and saute in a pan with extra virgin olive oil (or whatever else that you have on hand such as veggie oil or canola oil) until golden brown and cooked through.

  • When chicken is cooked, remove to a pan and tent with foil. You can also keep the chicken loosely covered in a 200 Fahrenheit oven.
  • Meanwhile, in the same pan, add approximately 1 T of butter and add the onion and garlic and saute until softened and transparent.
  • Add the mushrooms and cook until mushrooms are soft. Add salt and pepper as needed at this point.


  • Once the mushrooms are reduced in size, soft, and browned, add the chicken broth (or wine if using) to de-glaze the pan, making sure to scrape up any brown bits with a wooden spoon. If using the wine/broth mixture, add the wine first, scrape up the brown bits, and then add the broth.

  • Cook until the liquid is reduced by half, which should be around 3-5 minutes.
  • Add the cream and boil until the sauce thickens, about 3-5 minutes longer.
  • Stir in the peas and heat through.

  • Add the chicken and any juices from the plate back into the pan and heat through. Salt and pepper to taste.
  • Serve with mashed potatoes!
Notes: this sauce re-heats well and when we had leftovers, I added some cut up asparagus to the recipe, which was a great addition for this spring time veggie.