Wednesday, June 15, 2011

Pretzel Bites (with a surprise twist)!


One of my favorite food blogs is Crepes of Wrath.  I adore the photographs and how well she keeps the blog up.  Now that I am ONE DAY from finishing my internship, I hopefully will be able to keep up my blog posting as well as be able to focus on taking better photos!  This recipe comes from her blog and I hope you love it as much as I did.  Making bread and bread type products isn't very hard, you'll just need some time to let the dough rise.

They are so great right out of the oven, just don't burn your tongue!  They are best enjoyed on the day of, but if you keep them longer than 24 hours, store them uncovered, as they get soggy that way.  Enjoy!

Your ingredients...quite simple.

Prepare all ingredients below and mix with your dough hook until the dough pulls away from the bowl. 
Knead into a ball on a lightly floured surface. 

Place the dough in a lightly oiled bowl, cover with plastic wrap, and let rise about 1 hour until the dough is doubled in size.

Divide into eight equal portions and then roll those portions into logs about 20-22 inches in length. 

Cut the dough logs into 1 inch pieces and let rise, covered for 20-30 minutes.

Boil 8-10 pieces at a time for 30 seconds per batch.   Put the pieces onto a cookie sheet and brush with the egg mixture.  Sprinkle with salt to taste and enjoy.


Homemade Soft Pretzels 
For the pretzels:
1 1/2 cups warm water
2 tablespoons light brown sugar
2 1/4 teaspoons active dry yeast (I used rapid rise yeast and it worked just as well)
6 tablespoons unsalted butter, melted
2 1/2 teaspoons kosher salt
4 1/2 to 5 cups all-purpose flour
For cooking the pretzels:
vegetable or olive oil (for oiling your bowl)
3 quarts water
3/4 cup baking soda
1 whole egg, beaten with 1 tablespoon cold water
Coarse sea salt, fleur de sel, or kosher salt
1. For the pretzels: combine the water, sugar, yeast, and butter in the bowl of a stand mixer or a food processor and beat or pulse until well incorporated. Let stand for 5 minutes.  If you're using a stand mixer, use your dough hook, add in the salt and 4 1/2 cups of flour, and then mix or pulse on low speed until combined.  Bring the speed up to medium and continue kneading or pulsing until the dough is smooth and begins to pull away from the side of the bowl, about 3 to 4 minutes.  If the dough appears too wet, you can add more flour a 1 tablespoon at a time.  Remove the dough from the bowl or processor, place on a flat, lightly floured surface, and knead into a ball with your hands.
2.  Lightly oil a large bowl with vegetable oil or olive oil, then add the dough and turn it to coat with the oil. Cover it with a clean towel or plastic wrap and place in a warm spot until the dough doubles in size, about 1 hour. 
3.  Remove the dough from the bowl and place it on a flat, lightly floured surface.  Divide the dough into 8 equal pieces, about 4 1/4 to 4 1/2 ounces each.  Roll each piece into a long rope that is about 22 inches long.  Cut the dough into 1-inch pieces, then cover and allow to rise again for another 20-30 minutes.
4.  When the dough has risen again, preheat your oven to 425 degrees F.  Bring 3 quarts of water to a boil in a large pot and add in the baking soda.  Boil the pretzel bites in the water solution in batches, about 8-10 pretzels at a time is a good number.  Boil for about 30 seconds, then remove the pretzels with a large, slotted spoon or spatula.  Place pretzel bites on a lightly greased baking sheet, being sure that they are not touching one another.  Brush the tops with the egg and water mixture and sprinkle with the coarse salt.  Place the pretzels in the oven and bake for 15-18 minutes, or until golden brown.
5.  Remove to a baking rack and let rest 5 minutes before eating.  These are great fresh from the oven or room temperature.
 Cinnamon-Sugar Pretzel Bites!
We decided to try and make cinnamon-sugar pretzel bites from a few of the pretzels and it turned out pretty good.  Follow the steps below for a nice sweet treat.

1.  Boil the pretzels as above and brush them with the egg mixture, but do not salt them.

2.  Bake as directed and let them cool completely.  

3.  Make a cinnamon-sugar mixture with a ratio of 3 parts sugar to 1 part cinnamon.

4.  Melt 1-2 tablespoons of unsalted butter in a bowl.  Toss the pretzels in the butter in small batches and then coat them in the cinnamon-sugar mixture and enjoy! 

**Do not put the cinnamon-sugar on top of the pretzels prior to baking them.  The mixture will burn and not really give the good cinnamon-sugar taste you've come to expect from pretzels**

Sunday, June 5, 2011

BBQ Ribs!


So, once again, I'm embarrassed to admit that it's been entirely way too long since my last post.  Ugh.  However, last weekend, my good friend made these delicious BBQ ribs and I thought to myself, self, you can do this too!  You see, in the past, ribs have scared me.  I've had some good ribs in my life time (Gale Street Inn anyone?) and I thought to myself, why bother when you have places that will do the heavy lifting for you?  Well, MK inspired me and gave me the BBQ sauce recipe that she used and told how she made the ribs, and so after making them today, here they are!  Enjoy.

I used the following recipe quite closely, but next time, I'll definitely make some changes to the BBQ sauce, or perhaps I'll try a different sauce recipe.  

Recipe Modifications
This recipe is heavy on the onion flavor, so if you don't like onions, go a bit lighter on the onion.  For instance, don't use 1/2 cup of onion to saute, use a 1/4 of a cup.  In addition, cut the onion powder down to a 1/4 teaspoon, rather than a 1/2 teaspoon or omit it completely, which is what my friend did.  Also, you can use a sweeter onion, like a Vidalia.  

I like my BBQ sauce to be a bit on the sweeter side, so I added extra brown sugar at the end, once the sauce was reduced completely.  Add as much or as little as you like. 

BBQ Ribs

1.  Cut 1 slab of pork ribs in half.  This makes them easier to handle once they are on the grill.

2.  Sprinkle with a small amount of salt and a generous amount of cayenne pepper and black pepper. 

3.  Wrap them in foil packets and bake at 300 F for 2.5 hours.


4.  Here are the ingredients for the BBQ sauce.


5.  Combine all the ingredients in a medium sauce pan and bring to a boil.  


6.  Once boiling, reduce heat and bring the BBQ sauce to a simmer.  Simmer uncovered for about 1 1/4 hours until it's reduced. 


7.  Place on grill on direct heat and generously brush with BBQ sauce.  Heat until sauce is caramelized, but not burnt, unless you like that!

8.  Enjoy with summer favorites like grilled corn on the cob, sweet tea, baked beans, etc!  

I hope that you enjoy these ribs as much as my family and I did.

Friday, February 11, 2011

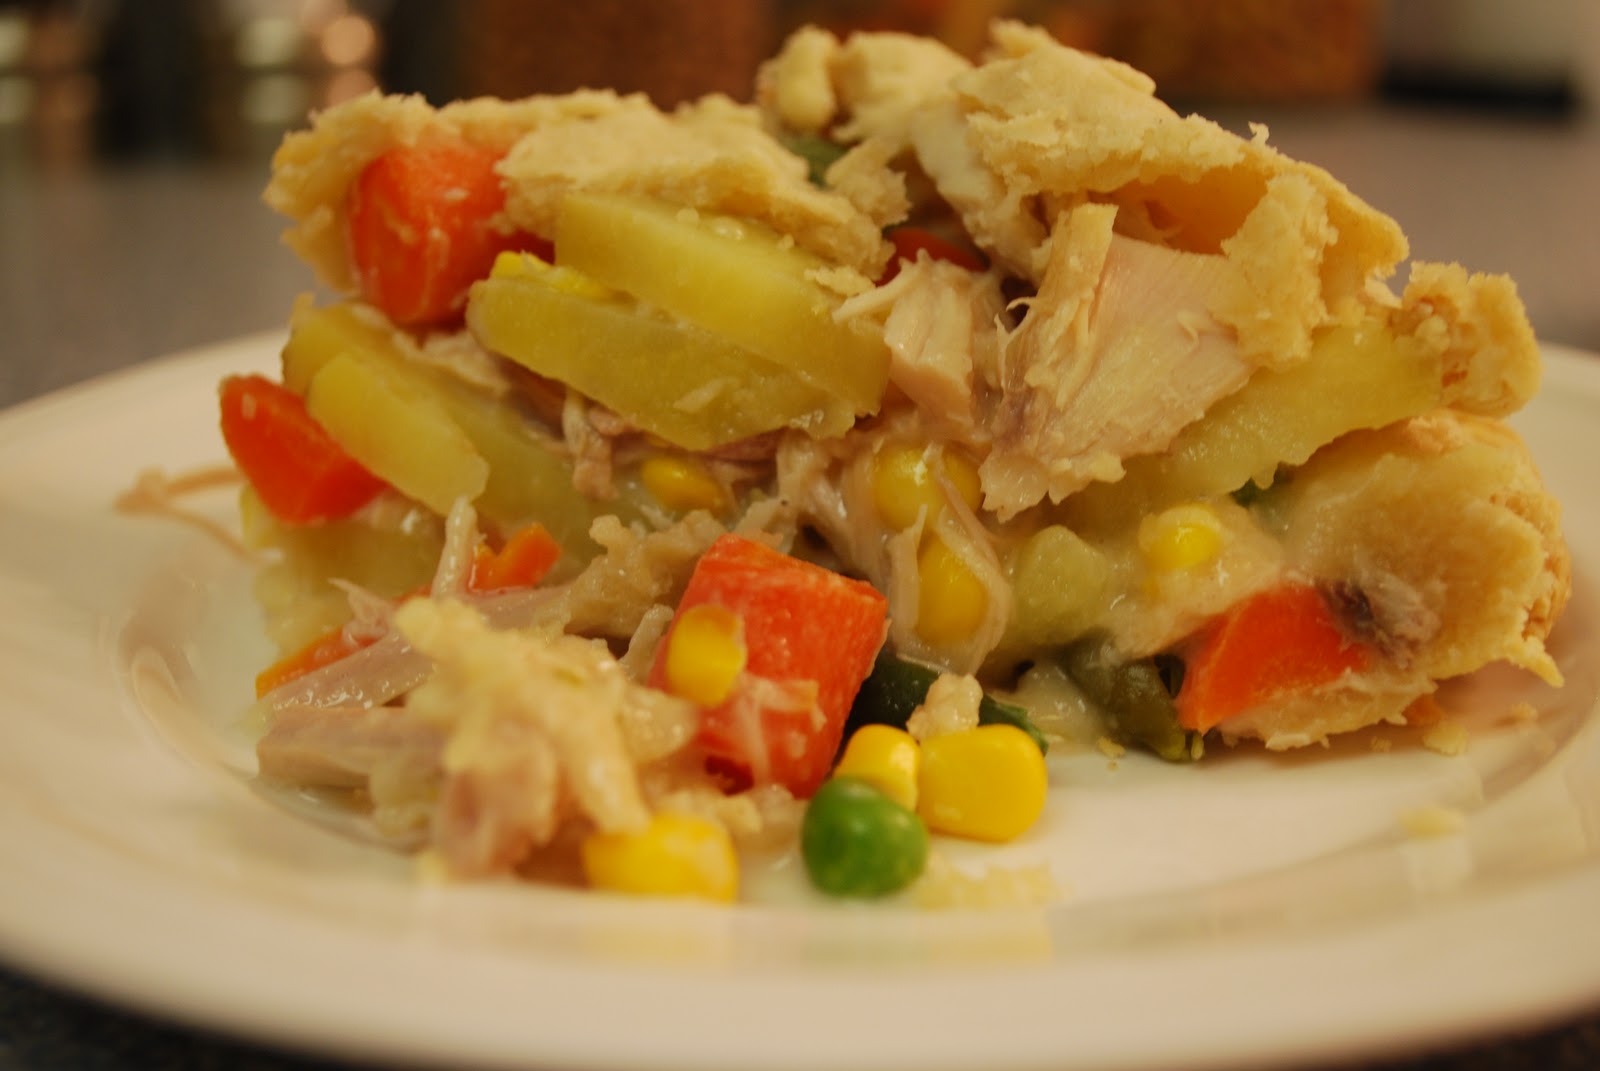
Turkey Pot Pie


So, I realize that I suck at this whole blogging thing.  Like my fiance says, bloggers start out strong, blogging daily or weekly and then give up after a while.  The funny thing is, I make all these things and take pictures of them but never get around to posting them.  Anyway, after way too much time, here's a post (finally)!

I used left over turkey from Christmas that I threw in the freezer for use another time.  I based my recipe on a chicken pot pie recipe from Paula Deen that can be found here.  The crust recipe was from Ina Garten and can be found here.  I did modify both of the recipes, which you can read!

Turkey Pot Pie Filling Modifications
1.  I roasted the carrots and potatoes as per the instructions, except I added extra virgin olive oil to the salt and pepper-they were delicious and I'd consider doing this in the future as a side dish that would go with a meal.

2.  I didn't have frozen peas, so I used a frozen veggie medley from trader joe's that included corn, carrots, green beans, and peas.  Because it had corn it in, I reduced the amount of frozen corn used and increased the amount of the mixed veggies.  It doesn't really matter what kind of veggies you use, as long as it equals the same total amount (1 1/4 cup).
3.  I didn't want to use heavy cream for health reasons, so I just used the milk I have at home, which was 1%.  It turned out okay, but I wouldn't suggest using skim milk--it would wind up being too runny.
Pie before baking!

Perfect Pie Crust Modifications
1.  I used two sticks of butter instead of 1 1/2 cups of butter and 1/3 cup of vegetable shortening.  I try to avoid using that product in general.  Otherwise I kept everything else the same.

Needless to say, the pie turned out great and the crust was SO GOOD.  I'll probably stay with this crust recipe for all my pie options! 

Pie after baking-look at that delicious crust!

Look at that filling!
I hope you enjoy this pie as much as I did.  Also, this recipe could be modified anyway you'd like it to be-it could be vegetarian or chicken and any combination of veggies can be used.

Enjoy!


Tuesday, November 2, 2010

Banana Cream Pie


As promised, the second post for the actual pie aspect of this series :)  This is my favorite type of pie, banana cream pie, which was given to me by the mother of one of my best friends.  It's quite easy, but I remember making it once for Pat's family and telling them how easy it was...he mom was like "you're making the custard from scratch!"  As it, it can't be that easy ;)  I have made a few modifications to the recipe, which is how I will post the recipe.  I hope you enjoy this pie as much as I do and if you're too busy to make the whole pie, you can always buy the crust from the freezer section...I won't tell ;)

Ingredients
Ingredients
1/2 cup white sugar
6 tablespoon all purpose flour
1/4 teaspoon of salt
2 1/2 cups milk--I use skim milk, although it would probably taste much more rich using whole milk.
1 egg
1 tablespoon unsalted butter
1 vanilla bean or 1 tablespoon of vanilla bean extract or 1/2 teaspoon of vanilla extract
3 ripe bananas
1 pre-baked 9-inch pie shell--deep dish works best, but I used a regular pie shell.
1/2 cup of heaving whipping cream, whipped

Directions
1.  Mix the flour, sugar, and salt together in the top of a double boiler.
2.  Slowly stir in the milk and cook over boiling water until thickened, stir constantly.

Custard before it thickens.

3.  After the custard thickens, cover the mixture for 10 minutes and stir occasionally, every 2 minutes works well.
4.  Beat the egg in a small bowl.  Add a small amount of the custard to the egg to prevent the egg from scrambling once added to the custard.  Combine the egg mixture to the custard and mix constantly for 2 minutes over hot water, not boiling water.
5.  Remove from heat and add the butter and vanilla.

Custard after the addition of all ingredients

6.  Allow mixture to cool for a few minutes.
7.  Slice and arrange the small amount of the bananas in the bottom of the crust shell in an even layer.  Cover the bananas with a portion of the custard.  Arrange another even layer of the bananas on top of the custard.  Cover the bananas with the remaining custard.
8.  Chill in the fridge for at least an hour.
9.  Cover with whipped cream if desired just prior to serving--enjoy!


Completed Pie without Whipped Cream

Here's a new addition to the blog--it's called Don't Let my Mistakes Happen to You!  What is it, is the part of my blog where I tell you what happened/went wrong while I was making the recipe.  So, enjoy and hopefully you'll learn from my mistakes.

Don't Let my Mistakes Happen to You!
I've done the whole, adding a small amount of the hot mixture to the egg thing to prevent scrambling, or cooking the egg, before and never had a problem, except this time...of course, when I need it to be perfect for my blog...wah wah.  Thankfully, it was only mildly scrambled, so it didn't affect the taste of the pie.  I recommend preventing this in the future by adding a larger amount of the custard to the beaten egg.  Then, I would make sure the water wasn't boiling in the double boiler (I think mine was boiling) before adding the egg mixture to the custard.  Theoretically, this should prevent this problem in the future.

Monday, November 1, 2010

Homemade Pie Crust


This is the first post in a series of posts about pie, which I absolutely love.  This first post will be about the homemade crust.  My second post will be about the banana cream pie...that's right, lovely, delicious, decadent, banana cream pie.


Now, to be honest, I've always shied away from homemade crusts because they can be so completely hard to make.  If you handle them too much, they become dense, hard, and not delicious at all.  This recipe however is a bit different in my opinion regarding taste and ingredient list-the crust rises a bit more than I'm used to because of the cake flour.  It can be made many different methods (with a stand mixer, hand-held mixer, mixed by hand, etc) and is pretty easy to whip up.  


Ingredients
1 c. cake flour
1 c. all-purpose flour
1/2 t. salt
3/4 c. cold unsalted butter, cut into 1/3 inch cubes
7 T. of ice water or heavy cream, or 2 egg whites, lightly beaten

Directions
1.  In a stand mixer with the paddle attachment, mix both flours and the salt on slow for 30 seconds.
2.  Add the butter and combine it with the flour on low to medium for 1 minute.
3.  Add the liquid and mix the dough on low to medium speed for 40 seconds to 2 minutes, until it looks like gravel.  If the mixture is still powdery after two minutes, pinch a small amount together; if it falls apart, add 2 more tablespoons of liquid; if it clumps together, continue mixing.
4.  Flatten the dough into a disk.  If not using right away, wrap in plastic wrap and refrigerate.
5.  Roll dough until it is approximately 2 inches wider than your pie plate.
6.  Place over pie dough and cut around the edge so there is an extra inch of dough hanging over the edge.
7.  Tuck the extra dough under to form a thick boarder.
8.  To flute the edges, press against both sides of the rim of the pie pan to get the pastry to rise up above it.  Press with 2 fingers on 1 side and 1 finger on the other to form the fluted edge.


9.  Blind bake the crust in a pre-heated 400 F oven with pie weights or beans lining the bottom for 15 minutes.  Take the weights out of the bottom and bake for another 15 minutes until golden brown.  Thinner shells and pastry with sugar brown more quickly.

To be honest, my boyfriend has made this shell before for a homemade apple pie and it was better.  We were discussing why and we've come to this conclusion: his crusts were thinner because he made a bottom and top from one batch, which I think made it more like a traditional crust.  The other thing I will do in the future is add 1/2 c. white sugar to the flours to make the crust sweet.  I think that I'm going to practicing pie crusts in the future, so look for those posts and learn from my mistakes!

Thursday, October 7, 2010

Chocolate Peanut Butter Cupcakes


These cupcakes were so ridiculously good...they're decadent, but not so rich that you can't eat more than one per sitting, which is a good thing, depending on who you ask :) 

I got the recipe from a blog I stumbled across called Joy the Baker.  You should check out her blog--she takes gorgeous pictures that I tried to model my pictures on, but, alas, her pictures are far superior to mine.  

Without further ado, the recipe follows...

Chocolate Peanut Butter Cupcakes
For the cupcakes:
1/4 c. all-purpose flour
2 c. sugar
1 c. unsweetened cocoa powder
2 t. baking soda
1/2 t. salt
1 T. vanilla extract
2/3 c. canola oil
2 t. white vinegar
2 c. cold water

Directions:
1.  Preheat oven to 350 F and line cupcake pan with liners.
2.  Shift the dry ingredient together and set aside.
3.  In a medium bowl, whisk together the oil, water, vanilla, and vinegar.
4.  Slowly whisk the wet ingredients into the dry ingredients.  Do NOT overmix!  The mixture will be wet.
5.  Pour the batter until the cups are 2/3 full and bake for 20-24 minutes until a toothpick inserted into the center of the cup comes out clean.


For the Frosting:
1.  1 c. (2 sticks) of unsalted butter at room temperature.
2.  1 c. of creamy peanut butter.
3.  3-4 c. of powdered sugar, depending on how thick you like your frosting.
4.  1 T. of milk.


Directions for Frosting:
1.  Beat butter and peanut butter together until smooth.
2.  Add 3 c. of powdered sugar and beat on low for 1 minute.
3.  Add milk and beat on medium-high for 1 minute.
4.  If you want, add the 1 other cup of powdered sugar.
5.  Decorate cupcakes and top with chopped peanut butter cups...Enjoy


Thursday, September 2, 2010

Homemade Pasta!


Well folks, Pat and I have the homemade pasta bug, which we acquired at a cooking class we took together on my birthday.  Basically making pasta is soooo easy, and it's fun (it's actually quite novel), so why not make some for yourself?  We (read: Pat) has been really, really, really wanting to make pasta at home since the class, and we finally did it (hey, it only took me about 2 weeks after the class to get the motivation to make the pasta)!

You don't necessarily need a pasta roller, to make pasta.  In fact, our teacher told us that the person who taught him to make pasta was an old Italian immigrant that lived in the Bronx; she used to make pasta everyday, roll it out by hand with a rolling pin, and hang it around her house to dry.  I have this very romantic image of this little old Italian woman in the bronx making pasta by hand...it really makes you appreciate the art of making food, like truly creating food for love, not just to stuff ourselves silly.  

Anyway, if you have a pasta roller, it does make the processes a lot easier.  The recipe for making pasta is ridiculously easy.  The one we used is from The Chopping Block...enjoy!

Your ingredients

Blend all ingredients 
Dough Ball
Roll out the dough.
Cut your pasta and enjoy.

Ingredients
2 cups unbleached all-purpose flour
1/4 cup semolina
3 eggs
1-2 tablespoons water

Directions
1.  Place the dry ingredients in the bowl of a food processor.
2.  Add eggs and 1 tablespoon of water; process until well combined.
3.  Test dough to make sure it will hold together.  If it is dry, add up to a tablespoon more water as needed to make the dough moist, but not sticky (I used 2 tablespoons of water).
5.  Wrap the dough tightly in plastic and allow it to rest at least 20 minutes.
6.  Roll out pasta in a pasta roller until smooth, then roll into sheets and cut into desired noodles.**
7.  Plunge pasta into rapidly boiling salted water, cook until tender, about 2 minutes, and serve at once with your favorite sauce.
8.  If you do not want to use right away, the pasta can be frozen, or laid straight to dry.

**To use a pasta roller: start by cutting dough ball in half.  Flatten one edge of dough ball to run through pasta roller smoothly.  After the dough has gone through one time, fold it into thirds to make a straight edge to run through the roller with the open edge feeding through the roller first (see photo below-excuse the blurriness).  Run thru the roller until you can seal the edges into a large loop.  Run the loop of dough through each size on the roller at least twice until the desired thickness.  Make sure to use enough flour to prevent sticking.  At this point the noodles can be cut by the machine or by hand. 


Homemade Spaghetti!